
Imagine:
It’s the middle of the night. You hear a high-pitched whistling or shrieking noise from your porcelain throne—randomly or when it is not in use. Also, you probably have to cover your ears every time you flush.
I feel you.
I, too, had this unfortunate experience with my otherwise good ol’ Kohler Santa Rosa.
Just so you know: the noise isn’t the worse part. The noise could be a symptom of an underlying problem. Left unchecked, it could lead to higher water consumption, higher water bill, or an overflowing toilet.
Thankfully, I had the privilege of knowing several licensed plumbers while running a full-service construction company in Phoenix, AZ.
I’ll use my first-hand experience to show you how to fix a whistling toilet right now.
Let’s get started.
Why Does My Toilet Whistle After Flushing?
In most cases, the cause of toilet whistling is a faulty fill valve or a metal ballcock valve. The water forces its way through a small opening if debris or dirt clogs the fill valve, causing the whistling sound. The deteriorating parts can vibrate, leading to the whistling or hissing.
Its internal parts can deteriorate, which results in the whistling, hissing sounds most folks encounter with this problem.
In some cases, a worn-out gasket or calcium buildup can be a problem, although less likely.
1. Most Likely: The Toilet Fill Valve is Blocked or Malfunctioning (Debris and Mineral Deposits)
A fill valve, called a ballcock, is responsible for refilling the tank after every flush.
Does your toilet also take a long time to fill? Most tanks refill in about one to three minutes, depending on the water pressure. Besides the noise, this could be another tell-tale sign that the fill valve is to blame.
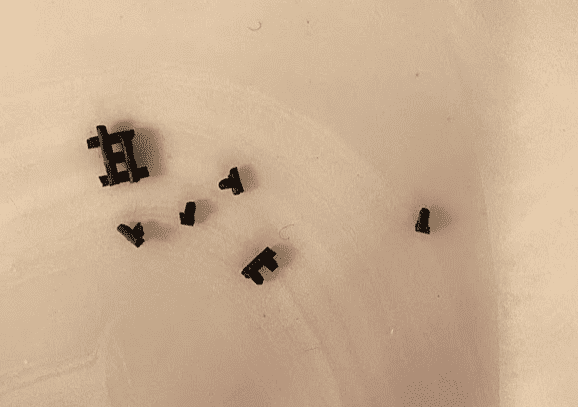
Due to the minerals in the water and other debris, the sediments can block the fill valve. Since the valve cannot open or close properly, the water forces its way through a small opening leading to this high-pitched sound. Think of how you whistle by blowing the air out through a small opening in your mouth.
You can skip to the next section to learn how to fix this even if you’ve never touched your plumbing system by a 10-feet pole before!
2. Also Possible: Worn Out Fill Valve Gasket
It’s the same problem as above. Skip to the next section to see how to replace the gasket/seal.
3. Less Likely, but Possible: Calcium Deposit Build-up Inside the Pipes
If you hear a noise, a whistling, hissing, or shrieking noise from the walls (the plumbing system), the pipes may be plagued with calcium deposits. As a result, water is forced through a smaller opening than was designed for the original plumbing parts—leading to this distressing noise.
This is more common in areas with hard water like Florida and Kansas City.
Fortunately, here’s a quick way to identify if you’ve hard water in your home’s water supply. Look for white stains around your toilet, showerhead, faucets, or sink.
In most cases, you should check the fill valve and gasket before inspecting for mineral deposits.
How to Fix a High-pitched Whistling Toilet Sound
Step 1. Inspect and Flush the Fill Valve and Gasket
Let’s try and clean the fill valve before attempting to replace it. Broadly, there are two fill valves: the newer cup valve and an older float ball/ballcock valve.
Follow the instructions accordingly.
If You Have a Cup Valve:
- Turn the toilet shut-off valve clockwise all the way to shut it off. It should be located on the wall below the toilet tank.
- Hold down the lever to remove water from the tank.
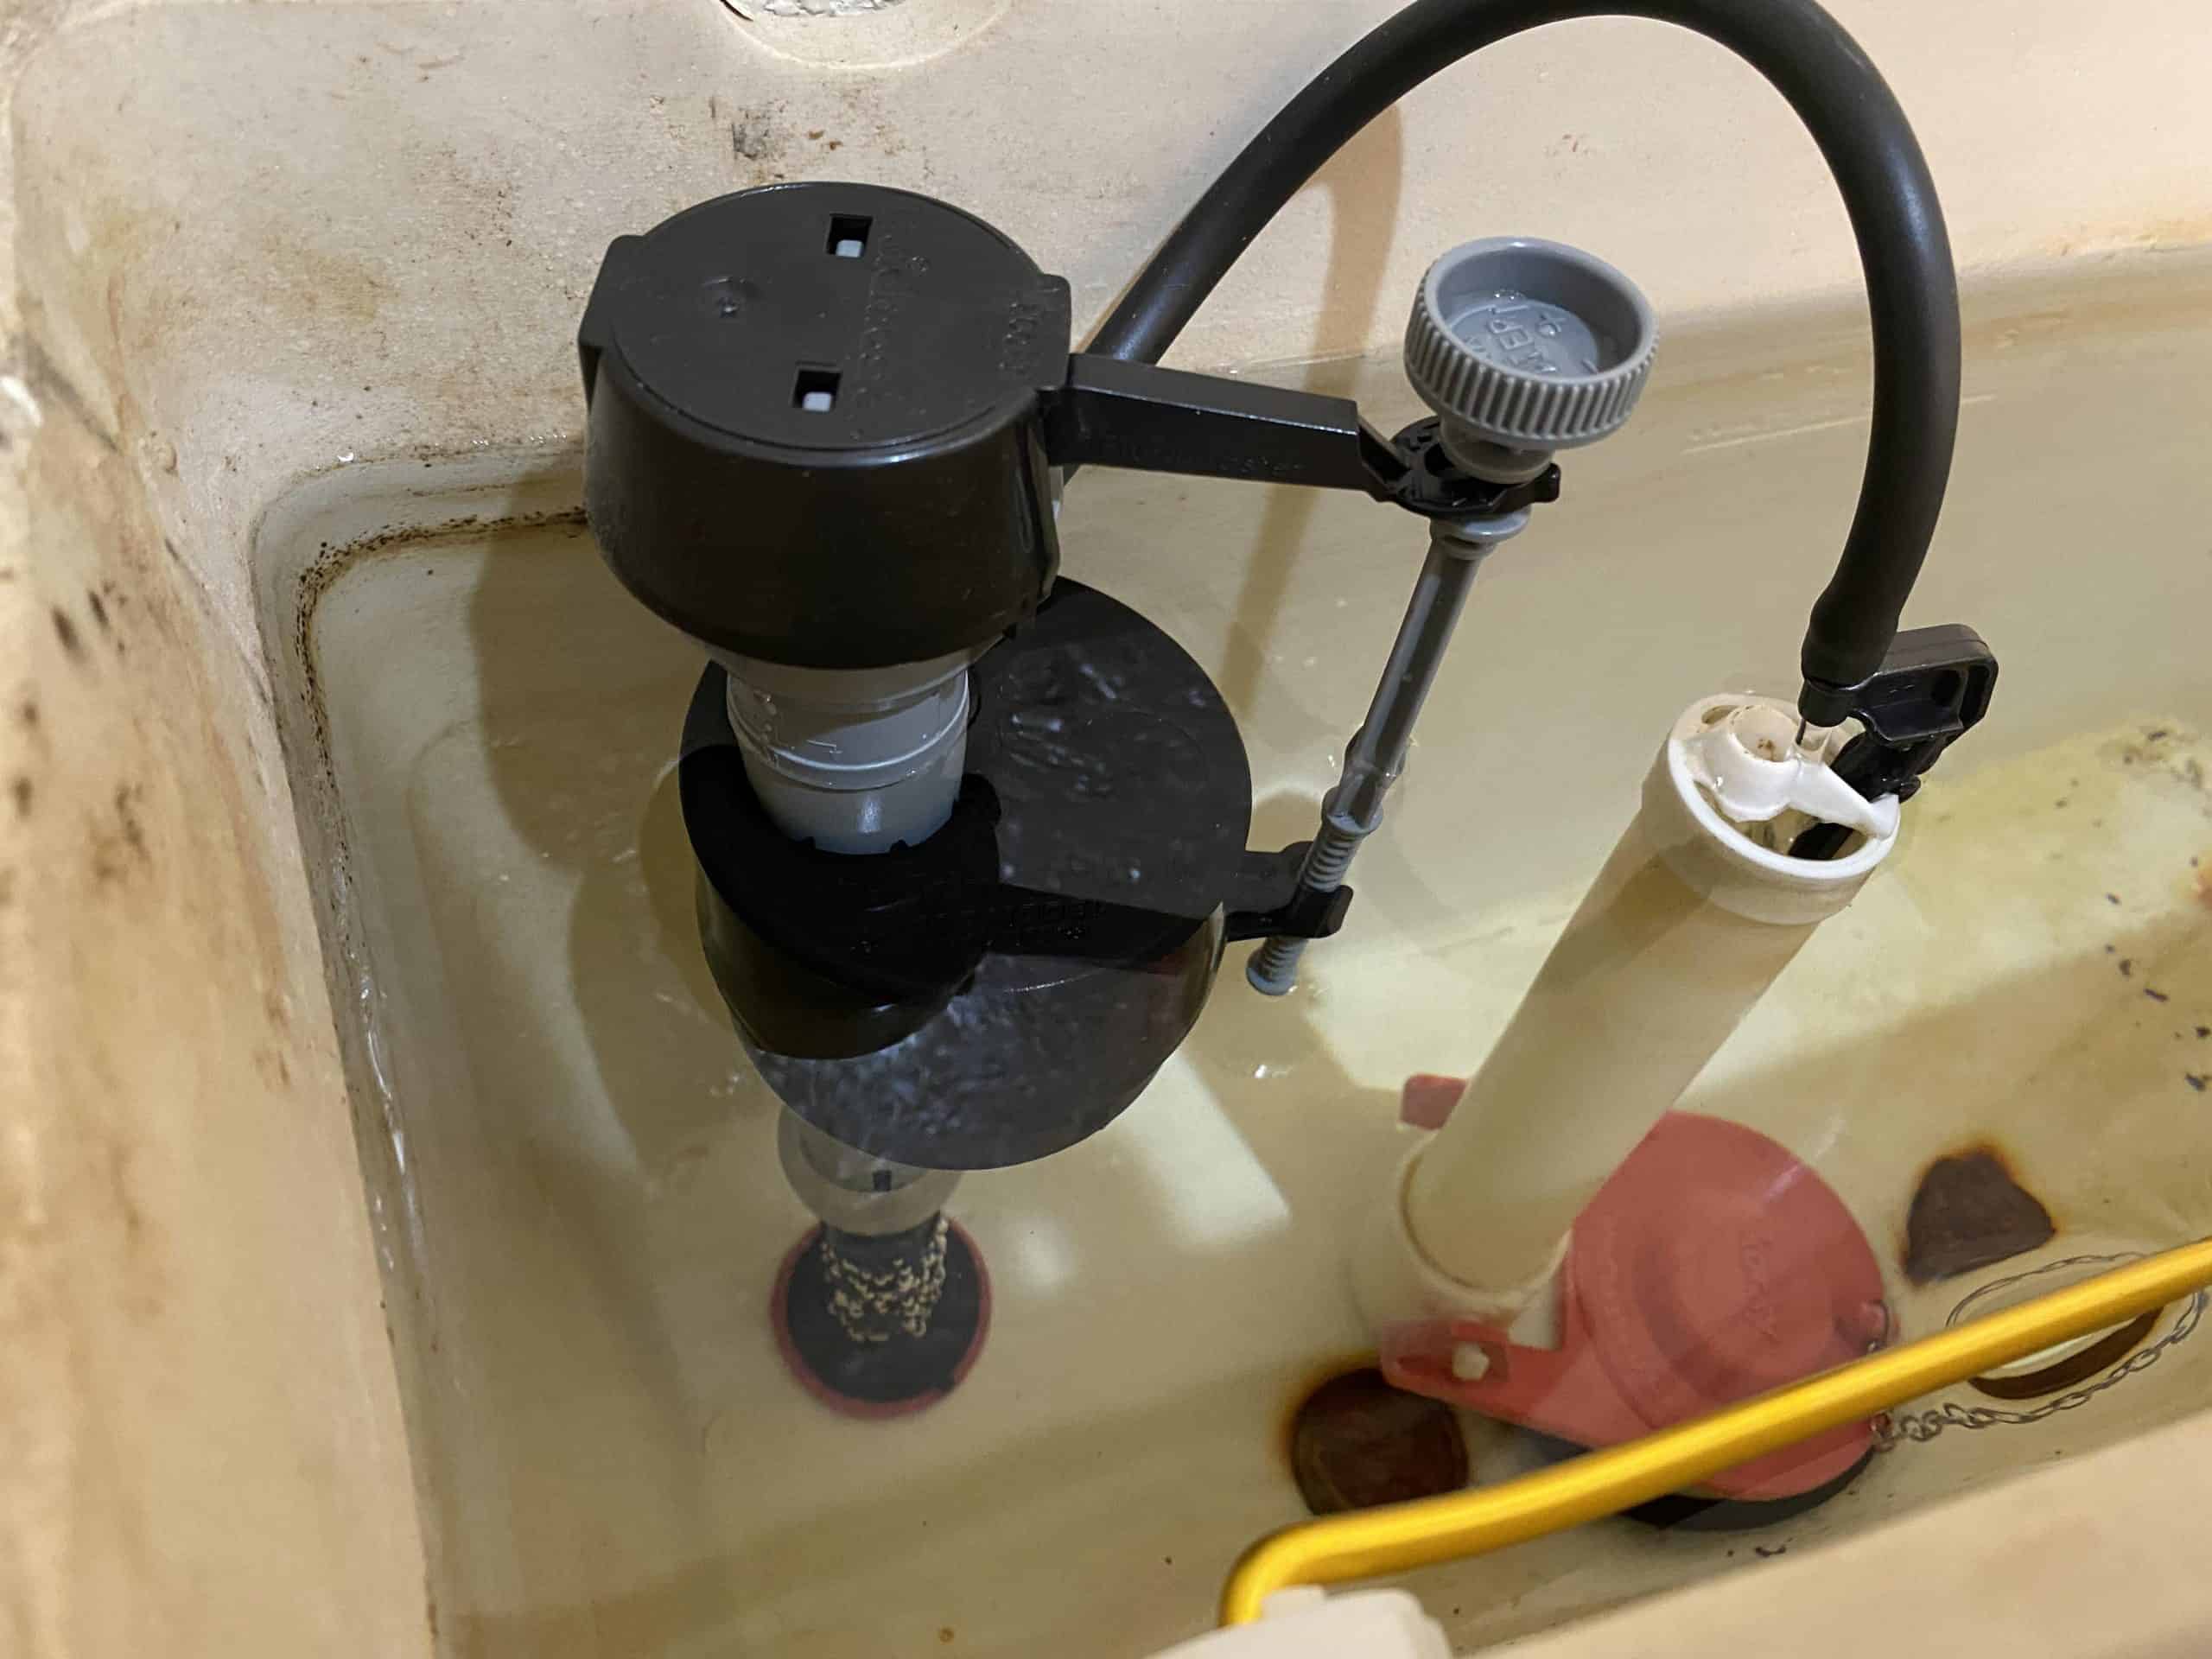
- Remove the tank top. Identify and locate the fill valve. It’s usually located on the left side.
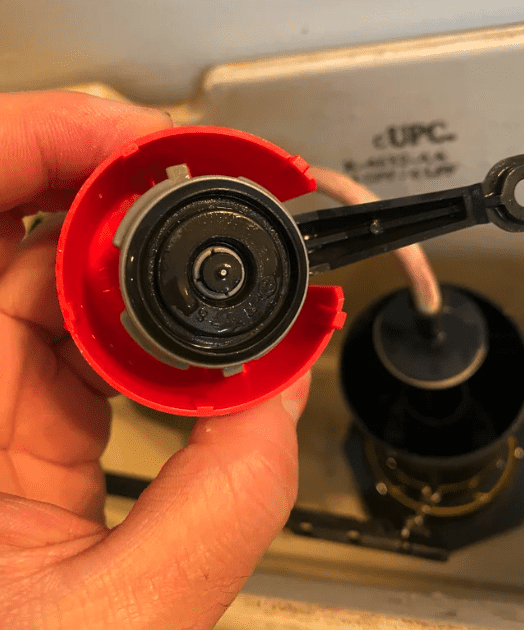
- Push down and turn around 1/8th counterclockwise to lift the cap from the top of the valve. The cap is usually red or black—or a different color than the body.
- You should see a seal/gasket under the cap. Clean it to remove any dirt or debris. If the seal has become hard, consider replacing it. You can easily find it in any local hardware store.
- Hold a plastic cup upside-down over the top of the valve. Turn the water valve on. Using the cup will prevent the water from splashing over you as the water pressure flushes debris out. Leave it for about 20 to 40 seconds, then turn it off.
- Put on the cap by turning it 1/8th clockwise. Turn on the water valve again.
- After the tank is refilled, flush a couple of times and check if you can still hear a whistling noise.
If You Have an Older Float Ball Valve:
Depending on the exact model, it may or may not be possible to clean a ballcock valve. Some are sealed, while others can be hacked around using screw-drivers.
While you can still use the above method in some cases, we recommend you replace the metal ball valve with a newer cup-style valve. Here’s why:
- Less Noisy: Instead of water splashing loudly into the cistern, the fill valve lets water through the bottom.
- Save on Utility Water Bill: Fill valves come with delayed fill, which means the cistern won’t refill until all the water for the flush has been emptied. It saves you around 0.3 gallons of water per flush by ensuring no extra water is wasted.
The Fluidmaster 400AH is a solid and super-inexpensive toilet fill valve ideal for high-efficiency 1.28 to 10.6 gallons per flush (GPF) toilets.
If flushing the fill valve and gasket didn’t help with the noise, or you decided to switch out your float ball for a cup fill valve, the next step is to replace the fill valve.
Step 2. Replace the Fill Valve
Here are the step-by-step instructions to replace the fill valve:
- Turn the toilet shut-off valve clockwise all the way to shut it off. It should be located on the wall below the toilet tank.
- Hold the lever to flush and empty the water in the toilet tank.
- Remove the lid and use a wet-dry vacuum to remove the rest of the water. Alternatively, you can also use a sponge to soak up the water.
- Keep a small bucket or a towel between the water supply hose and the tank to catch any water that might come out of the hose.
- Remove the water supply line underneath the tank by loosening the nut that connects the valve to the water supply.
- If you also got a washer assembly set, carefully install the washers where the fill valve goes through it. Ensure there’s a water-tight seal.
- Place the new toilet fill valve in place and tighten the nut. Connect back the supply line to the bottom of the new fill valve.
- Turn on the water valve. The tank should start refilling.
- You can proceed to adjust the float on the fill valve. We recommend you position the top of the float about 1 inch below the top of the overflow pipe. This ensures the float shuts the water before flowing into the overflow pipe.
For most people, replacing it should do the trick. If not, don’t worry; the following tip should have you covered.
EXPERT TIP!
FluidMaster recommends replacing the fill valve every five years to avoid noise or flooding problems. You may need to replace it sooner if you find rust or discoloration on the cap above the water line.
Step 3. Check Water Pressure, Flow Rate, and Calcium Buildup Inside the Pipes
This tip can be helpful if you hear a whistling or squealing noise from the water pipes leading up to your toilet.
Higher Water Pressure than Normal
The higher the water pressure, the more likely the pipes are to whistle. Normal water pressure for a home is 40 to 50 Pounds Per Square Inch (psi), ideally 50 psi. Note that this is the water pressure at your main line (where water enters your home)
Here’s an easy way to figure out if the water pressure is the culprit: Try partially closing the shut-off valve on the toilet. Is the noise eliminated?
If the pressure in your home is super-high, The Spruce has a great DIY guide on fixing it in an hour or two.
Higher than Normal Water Flow Rate
JGL Acoustics recommends that a building piping system’s maximum water flow rate in gallons per minute should be 4 feet per second.
| Water Pipe Diameter (inches) | Maximum flow rate (gallons per minute, gpm) |
| 1/2″ | 2.5 |
| 3/4″ | 5.5 |
| 1″ | 10 |
Calcium/Mineral Deposits are Blocking Airflow
You might be able to fix the minor buildup of mineral deposits with vinegar. However, we don’t recommend it for significant buildups. No licensed plumber will pour a CLR drain cleaning solution for pipes also used for drinking water. This can cause severe health issues.
The best long-term solution in our experience is to replace copper pipes with PEX plastic pipes. They’re resistant to mineral buildups. A local licensed plumber can help you walk through your options.
Is a Whistling Toilet Dangerous? What if You Ignore or Don’t Fix it?
A whistling toilet might indicate an impending failure of the fill valve. This can lead to more water consumption, higher water utility bill, or worse—overflowing toilet and home.
How Much Does it Cost?
Replacing a toilet fill valve and gasket assembly shouldn’t cost you more than $10 to $30.
Do I Need to Hire a Plumber?
In most cases, No. You can flush and replace the fill valve and gasket in less than 20 minutes—even with little-to-no prior knowledge.