
Does the constant noise of your ceiling fan get on your nerves?
Ceiling fans can become loud after a while of usage or sometimes even when they are brand new.
I was extremely irritated by the fan in my home. I could never concentrate—thanks to the constant rattling noise of the fan.
One day, my husband Daniel (who is a huge DIY enthusiast) decided to take the matter into his own hands.
We tried half a dozen fixes and learned a lot in the process.
No matter the type of noise your ceiling fan makes—you can likely find a solution in our research piece.
Ready to get started?
Let’s dive right into it!
Things You Will Need – At a Glance
- Things You Will Need – At a Glance
- Causes of Noisy Ceiling Fans – And How to Quiet a Noisy Ceiling Fan
- When You Should Get Professional Help to Fix Your Fan
- Ceiling Fan: Regular Maintenance and Cleaning Tips
- Why Is My Fan Only Noisy at the Top Speed?
- Do I Need to Lubricate Ceiling Fans? (How to Oil a Ceiling Fan)
- How Can I Tell If a Ceiling Fan Capacitor Is Bad?
Causes of Noisy Ceiling Fans – And How to Quiet a Noisy Ceiling Fan
Here’s a quick run-down to help you identify the kind of noise your fan makes (and then find potential fixes accordingly!)
Note: Remember to cut the power before trying any fixes.
Ceiling Fan Rattling Noise
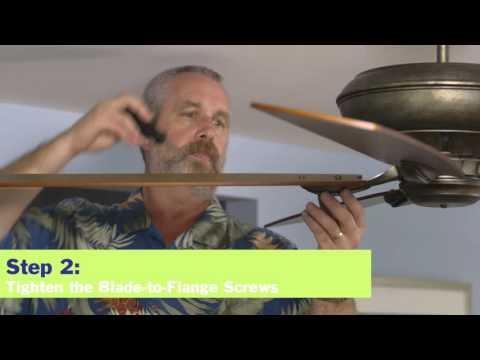
If you are hearing a constant rattling noise, it might indicate that either the screw or other small parts of the fans might have loosened. You can check for loose screws simply by opening up the product and finding it. Loose screws can be an actual danger to you and your family.
Once you open up the fan, check for loose screws and also make sure you tighten all screws but make sure it’s not too tight.
Another reason for the rattling sound may be the wire connectors. After switching on the main switch, check for the presence of all wires and make sure both are not overlapping.
Ceiling Fan Grinding Noise
Grinding noise might be an indication of a faulty motor.
It may also be possible that the fan motor may have lost its lubricating oil.
How do you rectify this?
Well, start by, putting a few drops of general-purpose lubricating oil on the fan motor bearings. For a thorough cleanse, you may have to remove a few parts of the fan and then put them back after oiling them.
Ceiling Fan Humming Noise
One of the most common causes of a humming ceiling fan is when the dimmer controls are being used to control fan speed. These kinds of switches are not supposed to be used with ceiling fans. Since this is not the right way, it might lead to a humming noise.
The fix?
Replace the dimmer controls with normal standard speed controls.
Humming can also be caused by bad receivers and capacitors.
A bad receiver will not get a good strong signal from the remote and this will result in a humming noise. You can solve this by removing the receiver and directly connecting the fan to the power source.
To fix a bad capacitor problem, you may have to switch up and or change capacitors.
What If These Solutions Won’t Work? What’s the Fix to More Complex Issues?
In most cases, you should be able to fix the squeaky ceiling fan issue using the aforementioned steps.
In the rare case that it doesn’t, here are some more advanced tips you can try:
You can try to rebalance the blades. Unbalanced fan blades might also lead to ceiling fan noise issues.
You can use a balancing kit to rebalance your fan blades.
When You Should Get Professional Help to Fix Your Fan
If you start smelling something funny or if you hear a weird sizzling noise, immediately switch off the fan and call for professional help. This may be because of a bad capacitor.
If you see a spark and hear some weird sounds, make sure you quickly turn your fan off and call help. Since the fans are all wired up in your ceiling, it may be very dangerous if the fan motor became a fire hazard. It could be very harmful to you and your family.
Ceiling Fan: Regular Maintenance and Cleaning Tips
Here’s are a few easy step-by-step tips you can follow to ensure smooth functioning of your fan:
- Firstly, turn off the fan before you perform any fixes
- Clean the blades completely using a microfiber cloth and an all-purpose cleaner. You can reach the fan by using a step stool or a ladder. Also, you can vacuum out the motor as dust can accumulate on it and cause a fan to run slow.
- Once the fan is clean, open the fan using a screwdriver and tighten the light fixture parts.
- Next, tighten the Motor Cover. Use the lubricant oil and drop a few drops on the motors bearings.
- Make sure that the bulbs are screwed properly. They may fall off if they are loose.
- Inspect the globe on the light kit if there is one.
- Check the screws connecting the fan to the ceiling mount. Make sure they are tightened properly.
Why Is My Fan Only Noisy at the Top Speed?
This may be because of a faulty motor box or ball bearings. On a higher speed, higher power is required and thus may lead to emission of noise at higher speeds.
Do I Need to Lubricate Ceiling Fans? (How to Oil a Ceiling Fan)
- Use a step ladder to get access to your ceiling fan.
- On your fan’s motor, locate the oil hole. This is usually near the down rod and is labeled.
- Spray the WD 40 degreaser on the whole via a straw. This will loosen up possible grime that has stuck on the bearings. Spray thoroughly and allow it an hour or two to evaporate.
- Once it has dried, prepare one or two ounces of oil and pour it in the oil reservoir.
- Spin the rotor by manually rotating the blades. Allow the fan to spin for several turns.
- Now get more oil and pour it to the reservoir until it’s full.
How Can I Tell If a Ceiling Fan Capacitor Is Bad?
The capacitor is usually a black box inside the switch housing of the fan.
If the case appears burnt or melted in any way, that is also the sign of a bad capacitor and it should be replaced. Keep in mind that there may be other components in the circuit with the defective capacitor.