
Are you looking to soundproof your room?
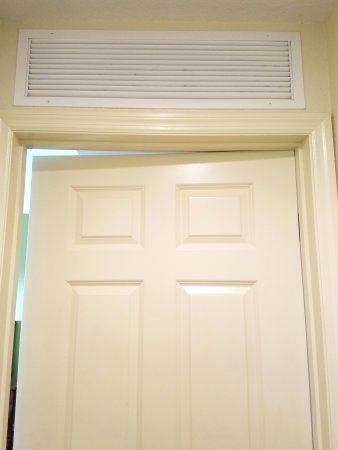
I eliminated the sound traveling through my door gaps and windows in the process, but I soon discovered that above-door air vents let sound pass through them. Therefore, you should give them special attention while soundproofing your room.
But, it is a little challenging to find a method that works for you, especially if you’re on a budget.
Therefore, I have prepared a list of helpful techniques to help eliminate sound coming through your above-door air-vent.
Things You Will Need: At a Glance
Soundproofing the Vents: What You Need to Know (FAQs)
What Is Flanking Noise?
While trying to eliminate the noise entering my room, I discovered there is a particular term for indirect noise. Flanking noises are the sounds that come from paths excluding the wall dividing you from the source of the sound. Here are a few examples to help you understand what I mean.
- Noise coming through air vents
- The sound coming from the duct of an HVAC system
- Sound transferred through interconnected floors and ceiling
How to Check Air Vents for Noise Reduction?
To get a better idea about reducing the noise, you must check the design and material of your ventilation system. It will help you choose which method you should use for soundproofing the vent.
I would recommend to clear off the area surrounding the vent so that you can work properly. Use a stable ladder if your vent is high up on the wall or the ceiling. If it is lower to the ground level, make yourself comfortable on the floor. Get a cushion or blanket to lay down comfortably. It will eliminate the strain in case you have to work for a while.
To see clearly inside the vent, use a flashlight. If you spot a grate, then remove it. You will need a screwdriver or a drill with proper bits to remove the screws.
Now, look for any problems in the duct.
To make it simple, check these following factors against your vent.
- Are there any bends in the duct or it connects two rooms with a straight path
- The material of your duct. Metal tends to propagate more sound
- Is there any sound dampening material already applied
- Are there any other obstacles for sound in the vent
After answering these questions, you will know exactly what needs to be done for effective soundproofing.
Will Soundproofing the Vent Affect the Airflow?
Yes. Since most of the sound you hear is transferred through the air, reducing noise also means reducing airflow. Therefore, before choosing from any given option, be clear about how much noise you can tolerate in the room.
If there is only a single window you might need a proper air flow through ventilation. If you are making a studio for sound recording then complete noise reduction is necessary.
According to your need, you should decide which method to apply. Eliminating the sound also means removing the passage of airflow.
I find it suffocating to be in a completely closed room for long hours. If it is essential for you to make your room noiseless, then make sure you are getting fresh air in between your work sessions to avoid suffocation.
Now that you have a better understanding of your needs with vent noise reduction, let’s go deeper and find the perfect method to fix your air vent’s noise.
How to Soundproofing the Air Vent for Cheap
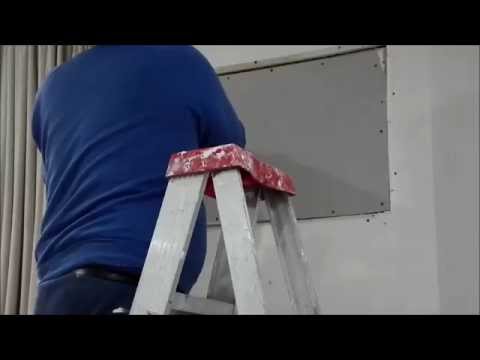
1. Block the Air Vent Using Drywall
If you want to seal the vent permanently, then I recommend using this drywall repair kit.
You can either fill the duct or fix some drywall at the openings of the vent. By doing this, you will block the vent, and it will look like a single wall.
Here’s how to do it.
- First, remove the metal grate covering your vent.
- If you want, you can fill the duct with some insulating material like wood or foam.
- Cut the drywall with proper dimension as per your vent.
- Fix the drywall at both the ends and apply some wall base adhesive to eliminate any movement.
- After that, you can apply some plaster over it to make it look smooth.
Watch this below video to get a better idea about applying the plaster.
You might have an active air conditioning system attached to the duct. In that case, there will be condensation which will be absorbed by the drywall and insulating material. You can put a waterproof tarp inside the duct before sealing it to avoid water leakage.
Once, done with this method you can paint the plaster to match your wall.
2. Use a Soundproofing Sealant
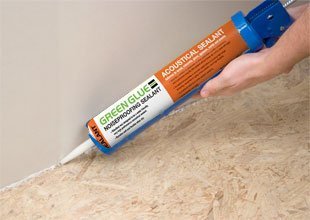
If you find the above method time consuming and want a quick DIY option you can choose using a soundproofing sealant.
This method is a little less permanent but is extremely easy and hassle-free. You can use this if you want a cheap workaround and might want to unclog the duct in the future.
- Begin with removing the vent grate using a screwdriver or drill.
- Clean the duct from inside so that no dust is present.
- Spray a soundproofing sealant to seal the duct. Here’s a great soundproofing sealant that I used for sealing my duct. Make sure you apply it slowly and properly to avoid gaps in the duct. Gaps may result in leaking sound.
- Now, put the grate back to its position, and you are good to go. You can also use sandpaper to make it smooth and then paint it over to match with the wall.
This sealant is foam based which means it will expand after applying to seal the gaps. Once set, it will be airtight and water resistant. So, you don’t have to worry about active air conditioning system. You can use sandpaper to make it smooth and then paint it over to match with the wall.
A significant advantage of using this process is it seals the duct permanently unless you decide to unclog it. If you want to reopen the duct for whatever reason, you just have to cut through the sealant foam using a drywall saw.
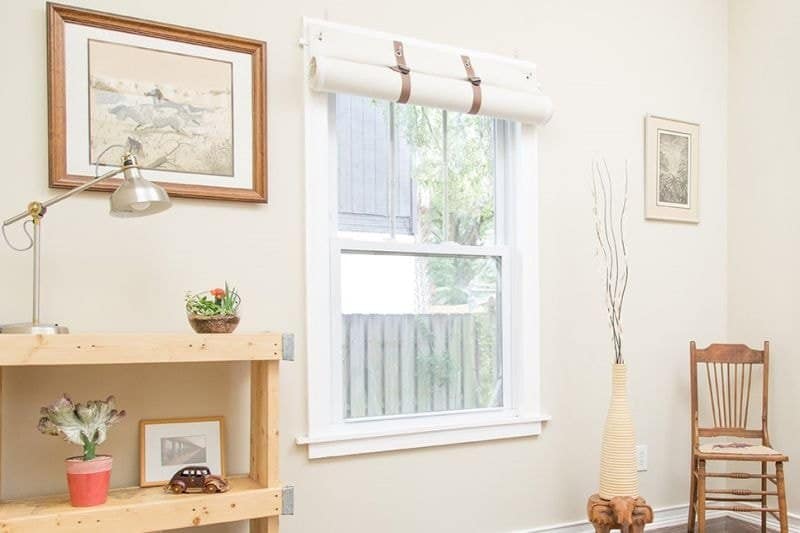
3. Using Soundproof Curtains or Blankets
If you’re looking for a temporary solution to eliminate noise from your air vent, this method works pretty great.
One of the easiest ways to get rid of the noise problem is using a soundproof curtain or blanket. You can fix a rod on your wall and hang a soundproof blanket on it. By doing so, you can eliminate the sound when you want, and remove the blanket when not needed.
Soundproof blankets are made of fiberglass which is an excellent sound absorbent.
Another way is using a soundproof curtain which can be hanged by installing the curtain rod. If there is only one above-door air vent in your room, then using a soundproof curtain will eliminate the sound coming through the air vent and the door at the same time. You don’t have to make arrangements to soundproof your door separately.
Purchasing a soundproof blanket having grommets can also be easily used instead of curtains. Grommets are those rings on top of the curtain you use to pass it through a curtain rod.
In case you have ceiling air vent then you can nail these blankets on the ceiling. I would not nail a blanket on the ceiling unless I don’t have other options. Anyway, it is a quick fix and can save you time.
You can also use this moving blanket which is used to wrap furniture when moving them. They are made very thick and are tightly woven to prevent any damage to the furniture. The same quality is also what we need to soundproof our vent.
4. Use an Acoustic Foam
If you want to seal the air vent and also remove it for using air condition and heater whenever needed, then using an acoustic foam is the best way to do it.
You can use this egg crate pattern acoustic foam to plug the air vent whenever necessary. Remove it when you want back your functioning air conditioning or heating. These foams are mostly used for soundproofing the wall inside a studio. It prevents bouncing of sound by absorbing it.
- Begin with applying a spray adhesive on the back/plain side of the foam. Remember some adhesive may burn down the synthetic foam. I found this spray adhesive on Amazon which works neatly.
- Stick together the foam pieces back to back until you reach the width similar to your vent depth.
- Now remove the grate and cut the foam with the same dimension as the duct. Try not to cut it smaller than the duct. It may result in gaps when fixing the foam inside the vent. However, cutting it slightly larger will not affect anything. They are soft and will bend a little to seal the space.
- After cutting the foam, put it inside the duct and reinstall the grate.
5. Plug the Vent Grate
If your air vent is letting a lot of voice to pass through and you want a temporary workaround for soundproofing, then you should try plugging the grate.
A loud air vent might also be indicating an uneven air flow. So temporarily shutting the passage is better than going for something permanent.
Here’s how to plug the vent grate.
- Start by removing the grate cover and take the internal dimension of the grate.
- Now, mark these dimensions on a plywood piece. Take plywood of width around a quarter inch at least for the best result.
- Since we want it to be temporary, I suggest using a waterproof tape for holding the plywood. It will also help with the condensation problem. Once sealed, place the grate back to its position.
Watch this below video to see how to pack the grate effectively.
In case you decide to revert the vent to its full functionality you just have to remove the grate and pull off the tape. For sealing the vent in the future, you can use the same plywood piece, thus saving a lot of work.
6. Create a Sound Maze for Your Air Vent
If you want to make your vent soundproof yet allow the air to flow, creating a sound maze is your best bet.
There are multiple reasons why you should create a sound maze. The foremost benefit is having the air flow while eliminating the air vent noise. Another reason to have sound maze is the problem of possible
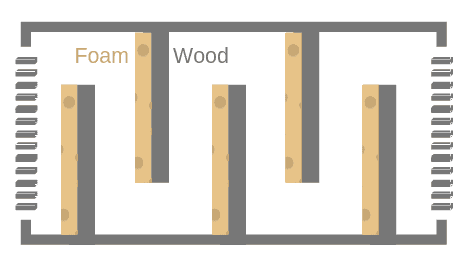
This method uses multiple perpendicular layers of insulation on both sides of the duct. It helps in sound dampening in the vent. The design of the sound maze forces the air to travel in a zig-zag path. The insulating material absorbs the sound, and the air continues to flow.
This is one of the most effective and practical methods to get rid of air vent noise.
Let me show you how to create a perfect sound maze.
Things You Will Need
- Acoustic cotton or this foam material
- Plywood that is about half an inch thick.
- A Ruler or any measuring device
- A Wood Saw
- Wood Glue
- A Screwdriver to remove the screws on your vent.
How to Create a Sound Maze
- First, make sure to cut your wood in pieces that measure a few inches shorter than the inside of your vent.
- Use a measuring tape or ruler for precise measurement.
- After cutting first part place it in the vent and check if it’s leaving some space at the top.
- When cut properly, you can fit the wood inside of your vent and also allow air to flow through.
- Take the foam material that you are using and stick it on the plywood. Make sure the foam is appropriately fixed. You can cut it the same size as plywood or cut excess material after sticking it.
- Next, apply some glue at the bottom of your plywood and fix it inside the back of vent leaving about an inch from opening.
- Repeat the above steps and fix the plywood on the lower and upper surface of the vent alternatively. The more boards you make more dampening of sound will be there. Make sure there is a gap of at least one inch between the boards for air to flow freely.
- Finally, replace the vent covers on the vents and enjoy the rewards of your hard work!
7. Soundproofing HVAC Vents
HVAC systems have a more complex structure than a regular vent. Therefore, it could be hard to resolve any noise related issue. Here are some methods you can try.
Upgrade the HVAC System
If you have the budget then upgrading the entire system is the best option. The new HVAC system will make less noise. It will also be energy efficient since more modern technologies are included.
Duct Liners
You can try lining the duct if you want to save some cost. Duct liners are made of sound absorbing material. The reflection of sound inside the HVAC ducts can be countered using this method.
You have to fit the duct liner inside the HVAC duct. Without lining the air flows very smoothly amplifying the noise. I found this duct liner to work effectively.
Using Flexible Duct
It is better to have a flexible duct instead of plain metal ducts. The flexible duct can be bent from various position making it hard for sound to travel.
They are also easy to replace if it encounters any damage. I found this flexible duct impressive for household use.
Create a Sound Baffle
If you are willing to spend some time, then making a sound baffle is an excellent option.
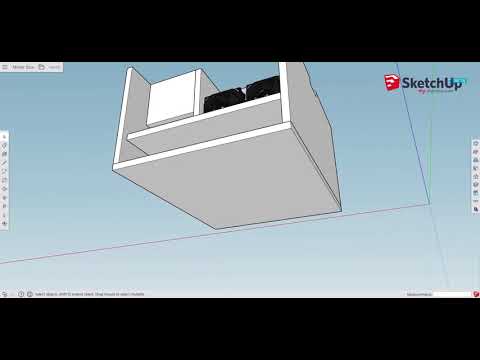
A sound baffle consist of a box. Similar to sound maze, It forces air to travel in a bent and elongated path which will absorb the sound. It is covered with insulating material from inside.
You can get a better idea of design from the below video.
Get Professional Help
Like I said earlier, HVAC systems are relatively complex than normal vents. You might find it difficult to pinpoint the exact problem with your system.
You should call a professional for checking the vent. You will be spending more money but at the same time it will be more effective.
8. Home Renovation
Do you have some extra cash at your disposal?
If yes, then getting rid of the duct is the best option to get rid of duct noise. You should only do this if it is vital for you to have a quiet room. Like if you want to create a studio in
If you plan to renovate your room, then you can also optimize your wall for better soundproofing. This will add up to a quieter environment.
Noisy Air Vent in Your Room? Easily Soundproof a Return Air Transfer Grill
In short, soundproofing an above-door air vent is not that hard. You can choose between any of the methods mentioned above. Ultimately, you must choose the best option depending on your needs from the room.
I hope you found a solution to your vent noise problem in this article.
Feel free to comment on any roadblocks that occur in your process of soundproofing the vent.
I would be glad to answer your queries/doubts.