
Does your toilet sound like a hissing snake?
In most cases, this could indicate a leak, even if it’s not visible at first glance. If you’re like me, you don’t fancy paying an extra $100 to $200 on top of your monthly water bill. Yes, the average leaky toilet can waste up to 200 gallons of water daily.
Sometimes, you can hear a faint hissing sound without water leaking (more on this later!)
No matter what your situation is:
I’ll share everything I’ve learned from several licensed plumbers while running a full-service construction company in Phoenix, AZ.
Here’s the inside scoop on how to fix your toilet’s hissing sound.
Before we begin, try partially closing the water supply valve to see if it reduces the noise. Even though the pressure is constant, reducing the velocity and volume of water can sometimes do the trick. One obvious downside is that the toilet tank takes longer to refill after every flush.

Kurt Joyce, ran a construction service company in Phoenix, AZ.
- 1. The Problem: The Flap Valve or Flapper has Worn Out or is Damaged
- 2. The Fix: Clean or Replace the Flapper or Flap Valve
- 3. The Problem: Water is Draining into the Overflow Tube
- 4. The Fix: Adjust the Fill Valve Float
- 5. The Problem: The Fill Valve is Malfunctioning, or the Seal is Clogged with Debris
- 6. The Fix: Flush/Clean the Fill Valve Seal or Replace it
- 7. The Problem: Toilet is Hissing But Not Leaking
- 8. The Fix: How Do You Get Air Out of Pipes
- 9. If Everything Above Fails
- 10. Frequently Asked Questions (FAQs)
1. The Problem: The Flap Valve or Flapper has Worn Out or is Damaged
What is a flapper valve, and what does it do: A flapper valve seals the opening between the tank and the toilet bowl. A flapper (a small rubber plug) lifts when you flush the toilet, allowing water to drain from the tank into the toilet bowl.
How to confirm if this is your issue: The most common tell-tale sign is that you also have a running toilet. Put a few drops of food coloring in the toilet tank. Don’t flush. Wait for 15 to 10 minutes. Your bowl’s water will turn the same color if a leak comes from the tank.
What’s actually happening behind the scenes: Most flappers are made of rubber to form a tight seal. Over time, this rubber washer can become warped or develop cracks, leading to leaks and hissing sounds. In our experience, using chlorine tablets in the tank can cause warping. The rubber surface can also develop a buildup of minerals, algae, or other debris, causing the flapper not to seal properly.
2. The Fix: Clean or Replace the Flapper or Flap Valve
First, ensure the flapper chain is of appropriate length: We highly recommend you do this before cleaning or replacing the flapper. This simple tip can save you time and money.
The flapper chain connects the flushing handle to the flapper. Ensure that the chain has only a tiny amount of slack, ideally around 1/2 inch. If it doesn’t have enough slack, the flapper might not be able to fit snugly—thus causing the leak and the sound. Last month, the chain in one of our toilets got stuck under the flapper, causing it not to seal properly.
Secondly, try cleaning the flapper if it’s less than five years old: Here’s how:
- Turn off the water supply to the tank by rotating the shut-off valve clockwise
- Flush the toilet to empty the tank
- Lift the flapper and scrub it with an old rag or a toothbrush
- If you see mineral deposits, use a mineral-removing liquid-like Lime-A-Way.
Turn the water back on and see if the issue is solved.
Thirdly, Replace the flapper if it’s more than five years old: It’s a good idea to replace it, even if it isn’t directly causing the noise. It costs less than $5, and you can pick it up at any local home improvement store like Home Depot or Lowe’s.
Before installing the new flapper, use a scouring pad to wipe down the edge of the hole of the flapper to ensure a smooth seal. Beware of using abrasives, as any scratches can let water leak through. I use the same type of dish scrubber I use on my non-stick pans, and it seems to work well.
Kurt Joyce, ran a construction service company in Phoenix, AZ.
Here’s how to replace the flapper on your toilet:
- Turn off the water supply to the tank by rotating the shut-off valve clockwise.
- Flush the toilet to empty the tank
- Remove the chain clip from the tank lever arm. This should be at the top of the tank.
- Unclamp the flapper clips from the mounting posts by pulling the flapper arm up.
- Align and snap the new flapper clips over the mounting pins.
- Attach the chain to the tank lever arm with the chain clip, threading the clip into a hole in the tank lever arm.
- Draw chain up to tank lever and using chain clip, attach to the tank lever arm, threading clip into one of the lever arm holes.
- Turn the water back onto the toilet. Once filled, flush the tank to check the flapper is operating correctly.
Turn the water back on and see if the issue is solved.
If you can still hear a hissing noise, the fill valve level may be set too high. Don’t worry, though, because we’ll fix it together in the next step.
3. The Problem: Water is Draining into the Overflow Tube
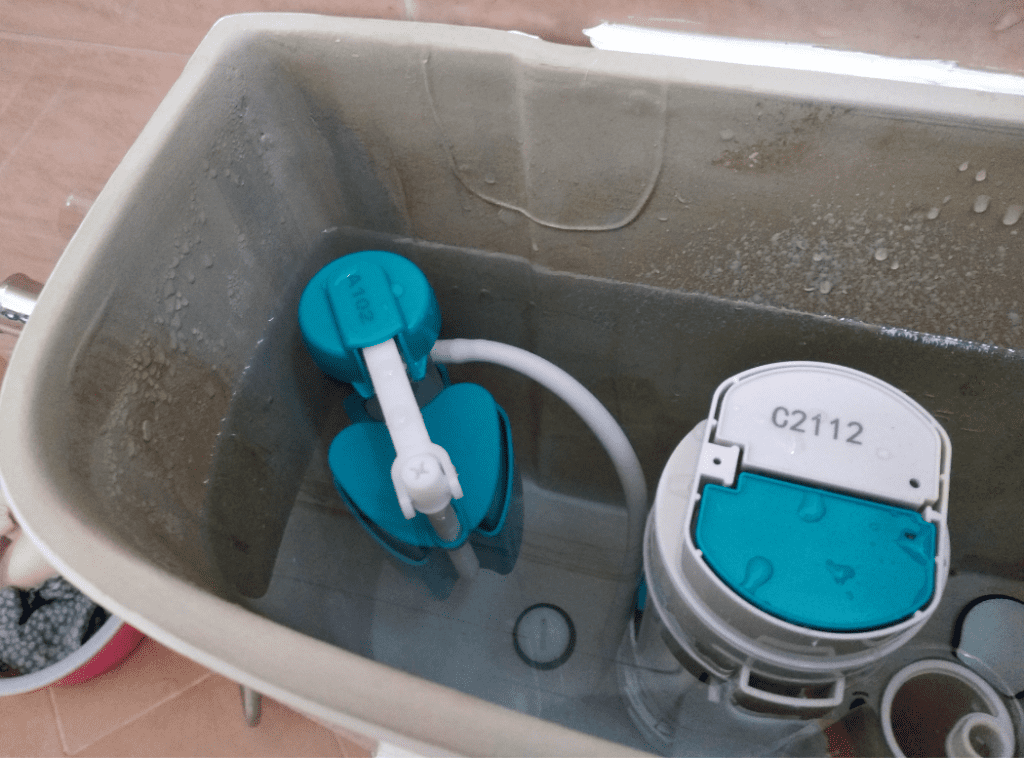
What is a fill valve, and what does it do: The fill valve (also called a ballcock) is responsible for bringing fresh water into the tank after you flush, and the float helps prevent the water from getting too high. It is usually mounted on the left side of the tank.
How to confirm if this is your issue: Remove the tank lid and check if water is running down the overflow pipe. Look for a vertical pipe inside the tank. If the water is running down, your refill valve is not shutting off when the tank is full.
What’s actually happening behind the scenes:
Toilet fill valves help control the water level in the toilet tank, so your toilet flushes at the best performance. If the fill valve level is too high, water can leak into the overflow tube. This leak creates a hissing sound.
4. The Fix: Adjust the Fill Valve Float
There are three types of fill valves: the plunger/piston-style, diaphragm-style, and cup-style (also called Fluidmaster). For brevity, we’ll only cover the float-cup style fill valve. This is because most modern toilets in American homes feature a float-cup fill valve. In the rare chance that your toilet features an older piston or diaphragm style, this excellent guide from the Spruce might help.
Here’s how to adjust a float-cup fill valve if it uses a newer screw mechanism:
- Turn the screw connected to the float arm to raise or lower the float. You can do so by hand or with a screwdriver.
- Rotate the screw clockwise to increase the water level and counterclockwise to decrease it.
- Adjust until the water level is 1 inch below the top of the overflow tube
Here’s how to adjust a float-cup fill valve if it uses an older metal-clip mechanism:
- Find a C-Shaped metal clip on the float valve.
- Squeeze and slide it up or down to adjust the water level. You can also use a plier to squeeze it.
- Adjust until the water level is 1 inch below the top of the overflow tube
If you can still hear a hissing noise, the fill valve or the seal may be faulty. Let’s walk through the problem next.
5. The Problem: The Fill Valve is Malfunctioning, or the Seal is Clogged with Debris
What is a fill valve, and what does it do: The fill valve (also called a ballcock) is responsible for bringing fresh water into the tank after you flush, and the float helps prevent the water from getting too high. It is usually mounted on the left side of the tank.
How to confirm if this is your issue: You might also experience that your toilet tank is filling slowly or is not filling at all.
What’s actually happening behind the scenes: Over time, debris or mineral deposits can build up inside the system, restricting the water flow. Sediments or debris can also deteriorate the fill valve seal, allowing water to seep, creating a hissing noise.
6. The Fix: Flush/Clean the Fill Valve Seal or Replace it
If your fill valve is over seven years old, we recommend you replace it even if it’s not the primary culprit of the sound.
Here’s how to flush and clean the fill valve and the seal:
- Turn the toilet shut-off valve clockwise all the way to shut it off. It should be located on the wall below the toilet tank.
- Hold down the lever to remove water from the tank.
- Remove the tank top. Identify and locate the fill valve. It’s usually located on the left side.
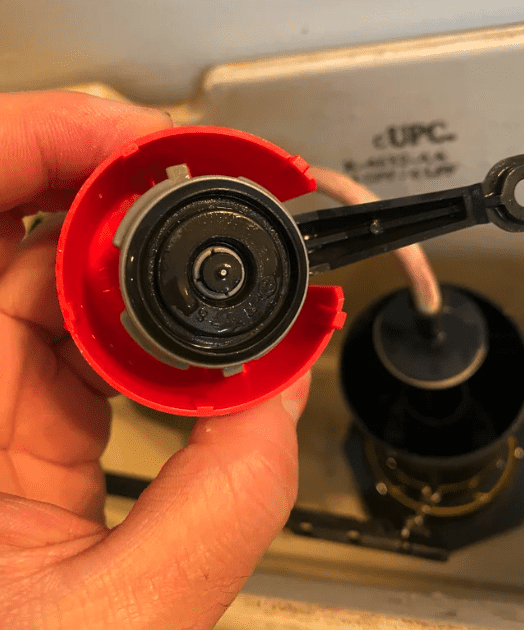
- Push down and turn around 1/8th counterclockwise to lift the cap from the top of the valve. The cap is usually red or black—or a different color than the body.
- You should see a seal/gasket under the cap. Clean it to remove any dirt or debris. If the seal has become hard, consider replacing it. You can easily find it in any local hardware store.
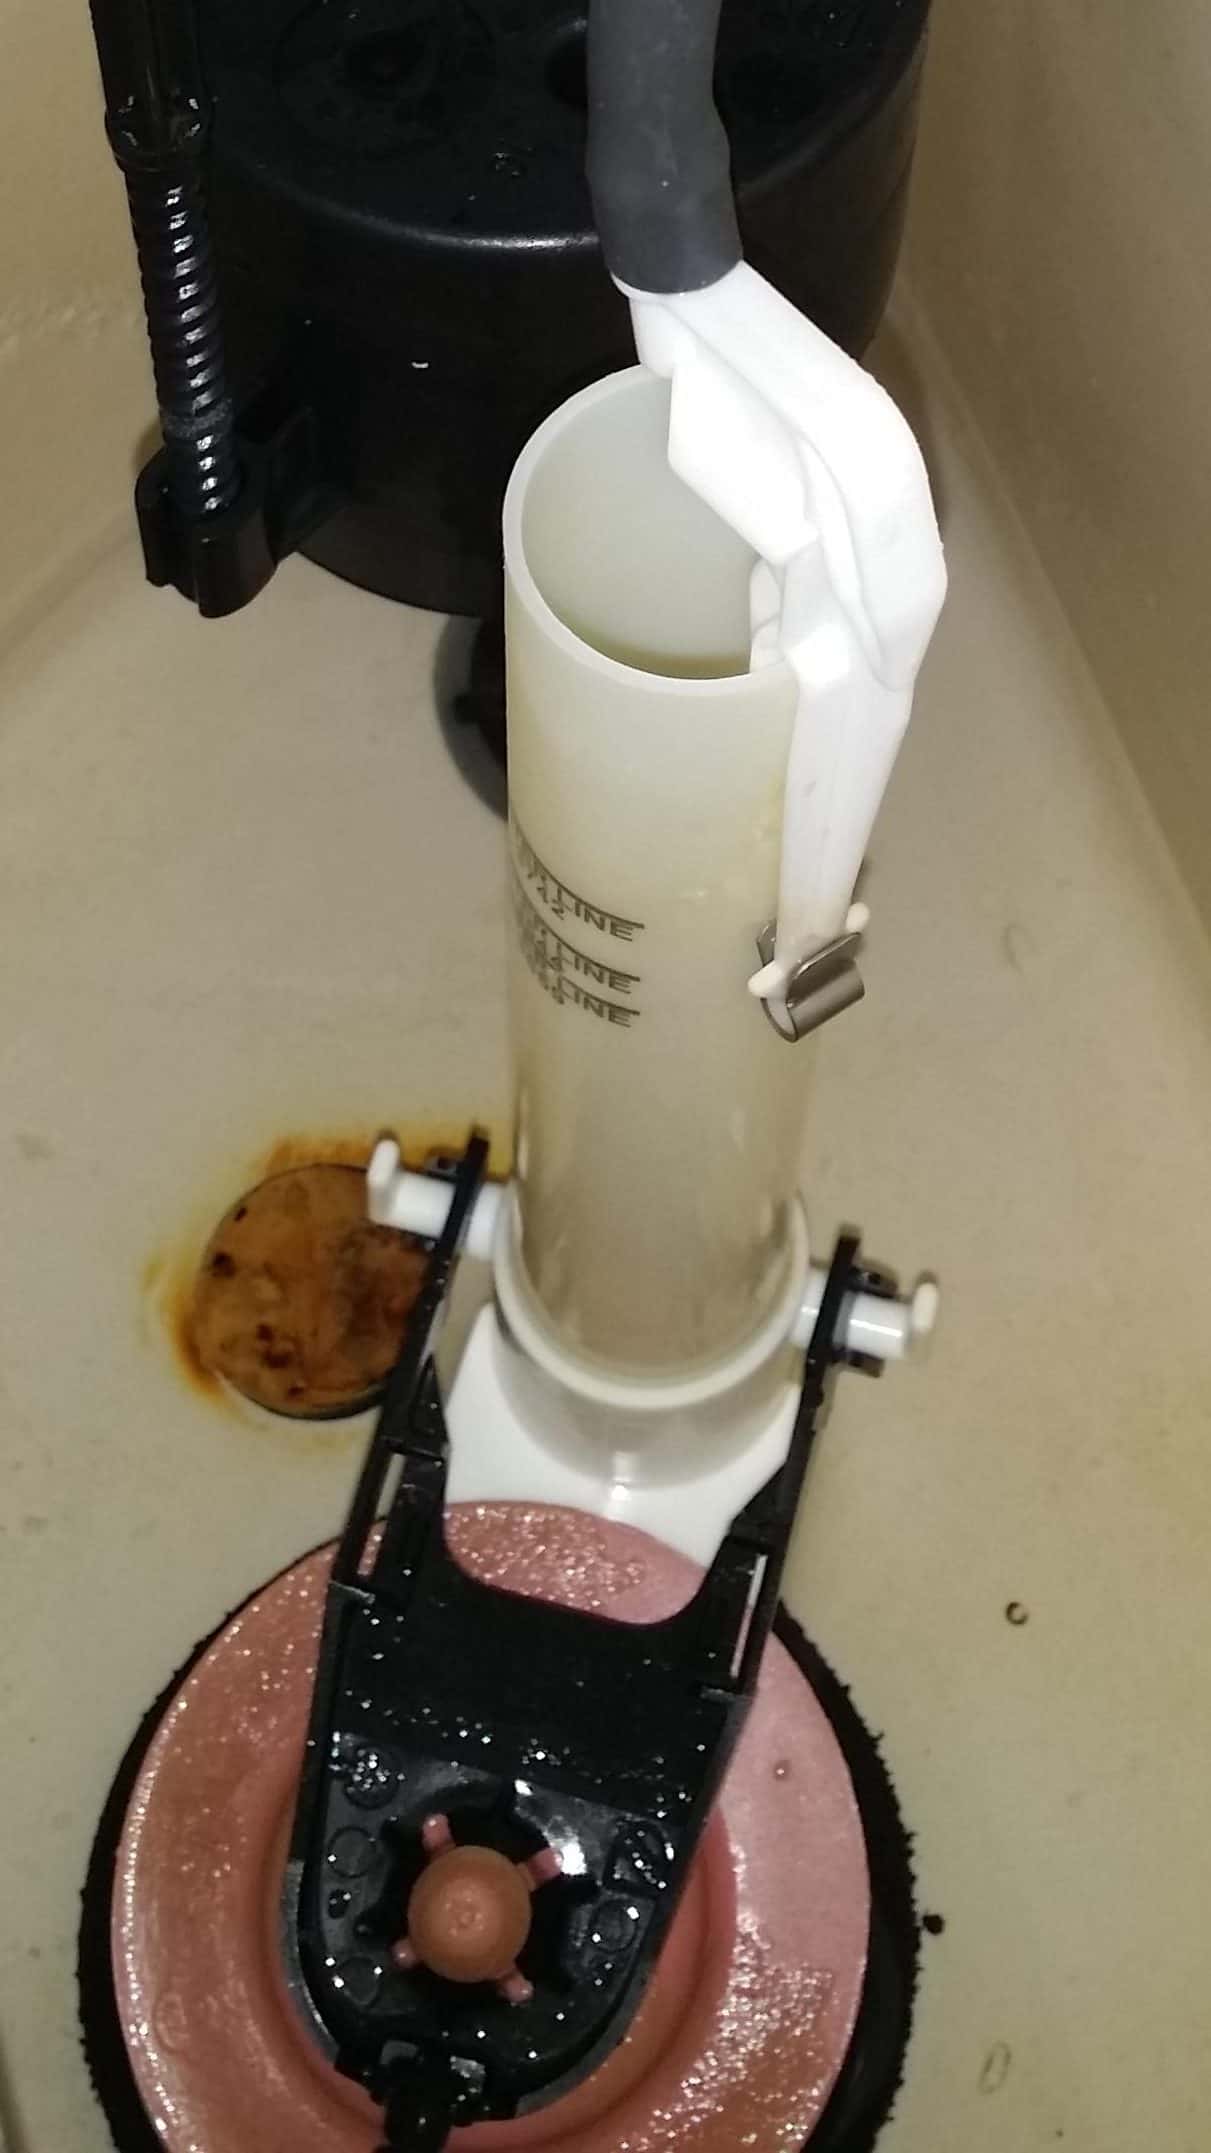
- Hold a plastic cup upside-down over the top of the valve. Turn the water valve on. Using the cup will prevent the water from splashing over you as the water pressure flushes debris out. Leave it for about 20 to 40 seconds, then turn it off.
- Put on the cap by turning it 1/8th clockwise. Turn on the water valve again.
- After the tank is refilled, flush a couple of times and check if you can still hear a whistling noise.
If cleaning doesn’t do the trick, replacing the fill valve might be a good idea. It’s inexpensive, and you can get a universal fill valve online or at a local home improvement store.
Here are the step-by-step instructions to replace the fill valve:
- Turn the toilet shut-off valve clockwise all the way to shut it off. It should be located on the wall below the toilet tank.
- Hold the lever to flush and empty the water in the toilet tank.
- Remove the lid and use a wet-dry vacuum to remove the rest of the water. Alternatively, you can also use a sponge to soak up the water.
- Keep a small bucket or a towel between the water supply hose and the tank to catch any water that might come out of the hose.
- Remove the water supply line underneath the tank by loosening the nut that connects the valve to the water supply.
- If you also got a washer assembly set, carefully install the washers where the fill valve goes through it. Ensure there’s a water-tight seal.
- Place the new toilet fill valve in place and tighten the nut. Connect back the supply line to the bottom of the new fill valve.
- Turn on the water valve. The tank should start refilling.
- You can proceed to adjust the float on the fill valve. We recommend you position the top of the float about 1 inch below the top of the overflow pipe. This ensures the float shuts the water before flowing into the overflow pipe.
7. The Problem: Toilet is Hissing But Not Leaking
How to confirm if this is your issue: You can hear a hissing or popping sound, but no water is spilled/drained into the overflow tube. Some other tell-tale signs are strange smells (like rotten eggs) or fluctuating water pressure.
What’s actually happening behind the scenes: Air has been introduced into your water system. The reasons can be overwhelmingly complex—ranging from drought to pump interruptions.
8. The Fix: How Do You Get Air Out of Pipes
Here’s how to get rid of air in water pipes:
- Locate and identify the main water supply to your home. If your home has a basement, it may be located near the front of the house on an interior wall. If your home was built on a slab, it might be inside your garage.
- If the valve is gate-style, turn it clockwise to turn it off. If it’s a ball valve, turn the valve 1/4 so it’s perpendicular to the water pipe.
- Open all the cold water faucets starting with the ones on the highest floor and working your way down. Let water drain from all the faucets for up to 30 minutes.
- Flush all the toilets. It might be a good idea to flush the water heater and other appliances.
- Turn on the main water supply. Wait for up to 10 minutes.
- Close the water faucets starting from the bottom and working your way up. The toilets should be automatically refilled.
9. If Everything Above Fails
In my decade-long experience, trying all the above should fix the noise issue in most cases. If it doesn’t, here are a few additional tips:
- Replace the flush valve assembly: You can get inexpensive universal flush-valve assembly at local stores.
- Contact a Licensed Plumber: A plumber could charge $150 to $300 for fixing a toilet. HomeAdvisor says some plumbers charge a flat rate or a service of $300 on average.
10. Frequently Asked Questions (FAQs)
Is a Hissing Toilet an Emergency?
No, a hissing toilet is not usually an emergency. However, we recommend addressing the issue as it could indicate a leak. The average leaky toilet can waste about 200 gallons of water per day which translates to approximately $100 to $200 tacked onto your monthly water bill.
Is a Hissing Toilet Dangerous?
A hissing toilet is not dangerous if there’s a simple issue with the fill valve or the flapper. However, if replacing them doesn’t work, it may indicate a serious problem with the water supply to the toilet or the plumbing area. In such cases, hissing could mean a leak inside a wall. We recommend you address this issue as fixing your drywall from water damages can be quite expensive, ranging from $300 to $850.
Is a Hissing Toilet Leaking?
A hissing toilet usually indicates a leak from the toilet tank to the bowl. In some cases, the toilet hisses but doesn’t leak. This could indicate air is trapped in your water or plumbing system. Follow our instructions above to get rid of the air in the pipes.