Are you a singer who is tired of having poor sound quality videos shot at home?
Do you want smooth, professional-quality music audios shot in your own abode?
I was facing quite a lot of trouble while recording my music at home. The sound was never right in the recorder. It was a disturbing sound almost all the time. Soon I realized that I will need a recording room or a professional booth at least.
That is when I starting searching for inexpensive options on the internet. I was surprised when I found out that it can be easily made at home! I shortlisted the best options for me. If I wouldn’t have made a vocal booth, I would still be struggling with my music recordings and it never would have helped me make my own albums.
Here are some best options to create your very own DIY vocal booth.
By the time you reach the end of this page, you will be surprised to know how little it takes for such a big change!
Why Do You Need a Vocal Booth?
Whenever we are at a concert, what is the first thing we notice?
Yes, the singer!
The singer always takes the center of the stage. That is the best setting to get the best vocal reverb. Reverberation is nothing but the resonance of sound. It is the echo-like sound that you hear in your normal recordings. You don’t want your voice to bounce off a lot- too much reverb, and at the same time, you don’t want it to be too dry. That’s exactly what a vocal booth does. It makes your voice come off as clear and dry.
That is why you need a vocal booth. Using a soundproof booth can be an expensive affair.
With some right knowledge and a few simple steps, you build your very own homemade sound booth which will be inexpensive and handy.
Are Vocal Booths Necessary?
Since vocals are often the loudest, most prominent element of a track any negative effects of a bad sounding room will be front and center in your mix. So it is very important that the main part of your song is perfectly recorded. It should not have any impact from the external environment—that’s why we notice that vocal booths are usually isolated, small rooms.
Vocal booths absorb the sound of the room around you, making your vocals dry and clear.
The reflections of a poor sounding room create a negative effect called comb filtering.
Comb filtering occurs when a sound adds to itself within a short time interval. Highly comb filtered vocal takes will turn your mix process into a nightmare. That’s where vocal booths come in.
Usually owning a vocal booth comes at high costs- $800 to $1500! That’s a lot.
So how do you own a vocal booth without spending a fortune?
You DIY it!
Why Build a Diy Vocal Booth?
1. It’s Easy
One might think that building a whole recording set is a very tedious task. Interestingly, all you require is a few things that you might already have at home. Namely—a few blankets, mattresses, plumbing pipes, etc.
2. It’s Soundproof
Building a vocal booth using soundproofing blankets or curtains will make space sacred, reserved for recording high-quality audios. Using soundproof curtains will make the whole room soundproof.
3. It’s Inexpensive
A DIY isolation booth is simple to make and does not put a hole in the wallet. It is cheap to build a vocal booth at your home.
4. Enough Reverberation
A vocal booth or a recording setup will give you the right amount of reverberation. It will bounce off the right amount of sound waves and make your voice sound crisp and smooth.
5 Common DIY Vocal Recording Booths
1. The Closet
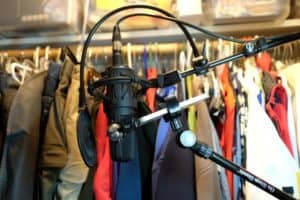
“If you want the feel of a recording room, just use your closet!”
You might have heard a lot of people telling us. Honestly, it cannot be farther from the truth. The problem is that people do not realize that singing in the closet can actually harm your vocal cords more.
DO NO USE THE CLOSET.
It is commonly believed that clothes soak up the vibrations, providing a better quality of sound. The biggest misconception of the closet booth is that clothing absorbs a lot of acoustic energy. Trust me, the number of clothes in your closet are not enough.
The whole idea behind the “closet booth” is misunderstood. It actually means to use a space that is very tiny and small. So small that you don’t get much reverb.
So, keep this option as your last resort.
2. The Blanket Booth
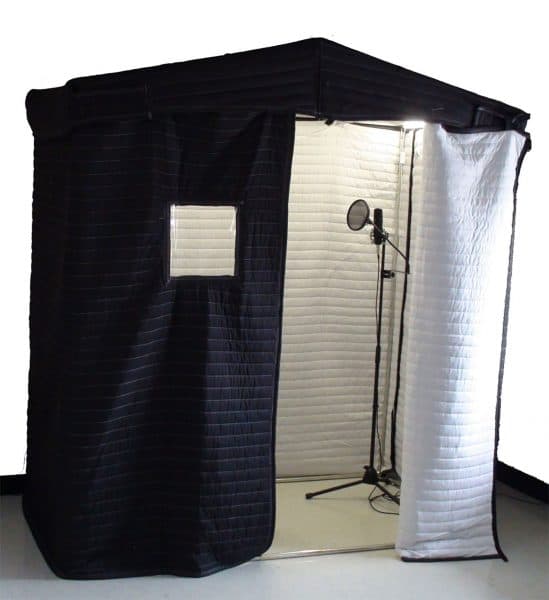
This is the hands-down the absolute best option if you’re looking to get stellar results. This is the one I actually use myself. It works great. It soaks up room sound on all sides, leaving your vocals nice and dry. Plus, it can be torn down and built back up, making it much easier to store.
How to Make a Blanket Booth From Scratch
Things you will need:
| Sr No. | Product | Description | Price |
| 1. | PVC Overflow Pipe 1.25 inch | Used to make the basic structure of the blanket booth | Check Price |
| 2. | T-Joints | Used to join the PVC pipes together | Check Price |
| 3. | U-Joints | Used to join the PVC pipes together | Check Price |
| 4. | Shower Curtain Hooks/Rings | Used to hang the acoustic blankets on the frame | Check Price |
| 5. | Acoustic Blankets/ Sound Absorbing sheets | Used to absorb the external noise | Check Price |
| 6. | Microphone Stand | Used to hold the microphone | Check Price |
| 7. | Microphone | Used to sing | Check Price |
| 8. | Pop Sheild | Used to filter the noise and protect audio | Check Price |
Step-by-step Instructions:
- Gather all the PVC pipes and T and U joints.
- Make a skeleton of the booth where you want to place the booth. Do this by using the PVC pipes and make a rough skeleton.
- Use the pipes, T and U joints to make the skeleton. Join the pipes using the T and U joints.
- On the top pipes, insert the shower curtains for hanging the sound-absorbing sheets.
- Completely cover the skeleton with these sheets.
- Now, your initial booth is ready.
- Inside the booth, add a lamp for light.
- Set up the microphone stand inside the booth.
- Your blanket booth is ready!
You just need a few PVC pipes and some acoustic blankets.
Acoustic blankets are nothing but soundproof blankets. They absorb maximum external sound from the environment.
A basic idea about a blanket booth will be—a few blankets hanging down some PVC pipes. These can be placed in the corner of a room and can be moved anytime you want.
Blanket booths give the best results. You actually geta private space to sing, and no echo that disturbs your recording.
3. Frame Walls- Soundproofing Blankets
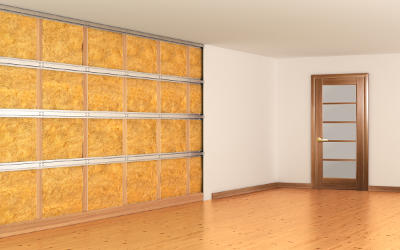
Using this technique, you can make the whole room a recording booth! All you need is a few thick acoustic blankets. You can use acoustic curtains too. You just have to frame your walls with these blankets- and your door, so that all external noise is absorbed by the material of such blankets. You can also make up acoustic panels.
You can use Grommets to hold the acoustic blankets in place. Grommets are like holders for these acoustic blankets. What hangers are for clothes, grommets are for soundproofing blankets. You can use these instruments to either frame the walls, or even frame the door.
If you have a really tiny room at home, you can turn that room into a soundproof one. Instead of using panels, you can frame the door with acoustic blankets.
4. Mattress Fort

All of us have been making mattress forts since we were little kids. It was always a place to play in. Looking in it in an innovative way- It is really cozy- a tiny, enclosed space. That’s all the requirements for a vocal booth!
A mattress fort can be made up of many thick blankets—even acoustic blankets can be used. It will give a better sound frequency and give a balanced vocal.
The actual design will vary on how many mattresses you have. If you only have two, place both behind the singer in a V-shape.
If you have three, place them behind the singer in a C-shape.
Is the mattress booth effective at absorbing reflections? Totally. Will it yield a more balanced vocal recording as a result? It will. Is it practical and easy to set up? Not so much.
But it is fun to make! You can always give this one a shot- even if it doesn’t work at least it was fun building one!
5. Reflection Filter
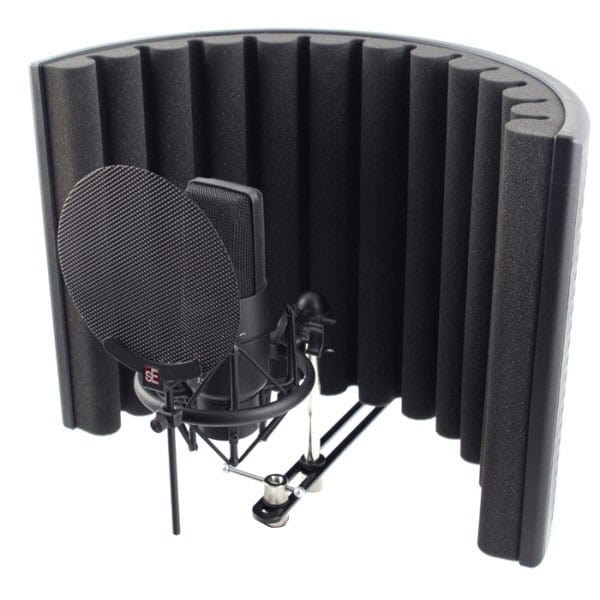
A reflection filter is what you have probably seen in many music stores or in videos of many singers. These are probably the least effective and most misunderstood/misused contraptions out there. We think they’re probably amazing because they’re professionally manufactured and cost around a couple of hundred bucks when in reality they’re basically expensive mic stand ornaments.
Placing them doesn’t really make a lot of difference as they do not cover any other side of the singer—just behind the microphone. That point is called the null point—It is the point where the microphone picks up the least sound.
Listed below Are the Advantages and Disadvantages of All the above Mentioned DIY Options:
| # | DIY Options | Advantages | Disadvantages |
| 1 | The Closet | You already have it! | You might actually get almost the same recording since the closet option does not work so well. The clothes inside the closet are never enough to soak up all vibrations. |
| 2 | The Blanket Booth | It is the best option- gives the best results | It is a little tedious to make. The acoustic blankets might be a little expensive for some. But this DIY technique gives you the most effective results. |
| 3 | Frame Walls | It gives a whole soundproof room. You can set up your mic in any part of the room. | It can be a little work to put all the panels on the walls and door. The blanket on the door can slip off if grommets are not used. |
| 4 | Mattress Fort | The tine space gives out a balanced vocal. | Difficult to store and it can fall apart any time! |
| 5 | Reflection Filter | Using this along with another option will give the best results. e.g. a mattress booth | Least effective; They’ll help, but you won’t get the results you’re hoping for. |
Is an Isolation Booth Construction Worth Your Time?
Absolutely!
Making a Vocal booth will be like a one-time investment.
Most of the above hacks are portable. You can build them once and then store them for the next time needed. Building these booths will not only give you a better sound but also give a better singing experience. Although using soundproof blankets can be a little expensive, it is truly a one time splurge since you can use it again. The homemade isolation booths are portable and reusable.
Does a Recording Booth Make a Difference?
Recording your music videos at home can be a pain. The weird echo that is heard in the recording is a true buzzkill.
To solve this problem all you need is a vocal booth. Now, we know that using a professional vocal booth can be such an expensive affair, so, why not make them yourself? These hacks will give you the best DIY vocal booth options to make at home. They are cheap and affordable!
Above are 5 most common DIY options for a vocal booth. I personally think that the #2 blanket booth is the best! It worked for me when I was having trouble with my improper music recordings.
You can decide which option works best for you by weighing its’ pros and cons.
Let me know in the comments below if any of these hacks helped you.
I will be happy to assist you with any queries.
